Sunday, November 15, 2015

Mini cinnamon sugar donut bites

Made these delicious and adorable looking cinnamon sugar donut "bites". They were super delicious and the perfect snack. They were really easy and fun to make too.

I will post the ingredients soon! 😍

Thursday, October 8, 2015

Apartment Progress

Lot of people have been asking me how my apartment renos/projects have been coming along. Here are some updated pictures if you don't have me on my social media pages to stay updated!

I definitely have put in A LOT of sweat equity into my place so far, and still have so much work to go..but I am in no rush! My kitchen is almost complete, as I have been so busy lately with life and trying to save more money a month with my budget binder (yes, that's right.. I have a budget binder! lol). To check out the before pictures check out my older blog posts to fully appreciate these pictures!


DIY key holder idea for under $5

I was walking around in a dollar store by my place to get some inspiration for little DIY design ideas and as I was walking through the picture frame aisle I had a brilliant idea. KEY CHAIN HOLDER! It also definitely matched the theme of my apartment I have going on. For anyone that knows me, knows I have THE WORST short term memory and always forget where I place things, so this is definitely something I needed to have. 

I got a picture frame and removed the backing and put it on my wall, and bought the same style hooks and voila! Little chic, super easy and cheap key holder! I spent under $5 on everything and if I ended up buying one I would have ended up spending more money and not nearly as cute :)


Patio deck tiles

Now that summer has come to an end, which I kind of am a little bit thankful for because the weather has been so hot, I finally had the chance to buy some patio deck tiles for my apartment.

What's so nice about these tiles is that they're so easy to install, instant upgraded look and you don't have to worry about putting shoes on to step out onto your deck! All big selling features for me! It definitely made me feel more confident in having someone come over and check out my patio, it made a HUGE difference. It made my boring skinny patio feel more modern and cozy, especially at night time :)

I researched a bunch of different locations on who sells decking tiles and most affordable per case. Lowes, Home Depot, and Costco were pretty much the exact same cost and were way too expensive ($30+) for only a 9 pack.. So of course I went to IKEA and got mine there.The ones I had hoped to buy were a case of 10 for $19.99 on sale, but when I got there they were all sold out!! So since I was there and was determined to walk out with deck tiles, I swallowed my pride and bought 4 cases of 9 tiles for $24.99. But after all said and done, it was well worth it! :)

Here are a few pics...


Monday, September 14, 2015

Sore tummy cure/cleanse

Almost all of my favorite things on earth to eat contains dairy, and lucky me I am lactose intolerant. Sigh!!

I had a delicious pasta yesterday that was 90% sour cream so you can only imagine the problems that happened after, I will leave the details out! Anyway, I always wanted to try some water infusion recipes so I ended up actually finding a really neat infusion pitcher for sale at Superstore on a whim. This thing is really cool!

For my sore tummy I decided to try cutting fresh slices of lemon and cucumber and putting it in my pitcher. Best to keep it in the fridge overnight. I wasn't planning on blogging this but as I am sipping it this morning and realizing how deliciously refreshing, healthy and calming to my stomach it is, I just HAD to share!

I am definitely going to try different infusion flavours as they all do different things for your body and health. I have a thyroid problem (hypothyroid) and I am definitely going to try a recipe that helps boost metabolism and energy and let you know my feedback. It is good to know your body and to be able to feel the difference when you ingest healthy and natural food choices!

Lets see how long I can keep this up for!

Sunday, September 13, 2015

Delicious Soft Pretzels

I was playing around on Pinterest on one of my days off (as usual lol) and saw this really yummy and surprisingly easy recipe for soft pretzels. I wanted to make something with flour because I just bought a jumbo pack of it and needed to use it up!

Here is the recipe I found online. Like I mentioned, it was really easy and you'll be enjoying your delicious soft pretzels within 30 minutes. Yum!

You can top them with salt, cinnamon sugar, and dunk in your favorite pretzel dips.

Ingredients:

1 and 1/2 cups (360ml) warm water (lukewarm, no need to take temperature)
1 packet active dry or instant yeast (2 and 1/4 teaspoons)
1 teaspoon salt
1 Tablespoon (8g) granulated sugar
3.75 - 4.25 cups (480-530g) all-purpose flour + more for work surface (or mix of whole wheat flour and all-purpose flour)
1 large egg, beaten
coarse sea salt for sprinkling

Directions:

Preheat oven to 425°F (218°C). Line baking sheet with parchment paper or silicone baking mat. Set aside.

Dissolve yeast in warm water. Stir with a spoon until fairly mixed, about 1 minute. Some clusters of yeast will remain. Add salt and sugar; stir until fairly combined. Slowly add 3 cups of flour, 1 cup at a time. Mix with a wooden spoon until dough is thick. Add 3/4 cup more flour until the dough is no longer sticky. If it is still sticky, add up to 1/2 cup more. Poke the dough with your finger - if it bounces back, it is ready to knead.

Turn the dough out onto a floured surface. Knead the dough for about 3 minutes and shape into a ball. With a sharp knife, cut ball of dough into 1/3 cup sections. This measurement doesn't have to be exact - use as much or little dough for each pretzel as you wish, the size of the pretzel is completely up to you.

Roll the dough into a rope with an even diameter. Approximately 20 inches long. This measurement will depend how large you want the pretzels. Once you have your long rope, take the ends and draw them together so the dough forms a circle. Twist the ends, then bring them towards yourself and press them down into a pretzel shape.

In a small bowl, beat the egg and pour into a shallow bowl or pie dish. Dunk the shaped pretzel into the egg wash (both sides). Place on baking sheet and sprinkle with salt.

Bake for 10 minutes at 425F degrees. Turn the oven to broil and bake for 5 more minutes to brown the tops. Watch closely to avoid burning.

Allow to cool and enjoy. Serve warm or at room temperature. Pretzels may be stored in an airtight container or zipped top bag for up to 3 days (will lose softness).

For the cinnamon-sugar version, bake the pretzels as directed without an egg wash. Remove them from the oven after 10 minutes. Melt 2 Tablespoons of butter and brush the tops of the pretzels with it. Mix together 1/3 cup granulated sugar with 1 teaspoon of cinnamon. Sprinkle over each pretzels. Return to the oven for 5 more minutes at 425F. (do not broil).

So for my first time trying out this recipe, thank you Sally's baking addiction, I learnt my lesson on using longer ropes to shape the pretzels as they expanded so much in the oven. But who are we kidding, it was the taste that mattered anyway not the shape and they were so darn yummy and the dough was absolutely delicious! Must try people!

Try this recipe and let me know how you guys liked it also! Perfect cozy, warm snack for fall weather coming around.

Wednesday, September 2, 2015

Butternut squash soup recipe


I love butternut squash soup and now that the weather is starting to cool down and fall is approaching I got ambitious and decided to try to make it myself! Best part about this recipe is that it's fast, simple, and super delicious! Can't go wrong!

Soup: 
1 1/2 tbsp butter
3 1/2 cubed and peeled butternut squash
3/4 cups chopped carrots
1/2 cup chopped onion
2 1/2 cups chicken broth
1/4 cup half-&-half cream
1/8 salt (or to taste)

Garlic Cheese Bun on the side (Optional)
Bun of choice sliced in half
1 tbsp margarine
2 heads of garlic crushed
shredded cheese (amount optional. its cheese, duh!!)

Directions:
1) Place butter in pot and put squash, carrots, and onions in and sauté until slightly softened on med-high heat.
2) Pour in chicken base and bring to a boil and cover for approximately 10-15 minutes on lower heat. Check often to make sure veggies are not too soft, you don't want them to be too mushy.
3) Move from heat and pour in half-&-half cream and salt, stir.
4) Place mix into blender and blend until you have the consistency of your preference. I liked mine to be somewhat thicker.
5) Add salt and course ground pepper to taste (optional)
6) Add sour cream as garnish, it adds extra deliciousness to the mix!
7) For the garlic cheese bun as a side dish mix butter with crushed garlic and brush on buns, place shredded cheese over and broil for 5 minutes (or until cheese is melted)
8) Voila! Enjoy :)

I hope you guys like this recipe as much as I did. Like I mentioned it was very simple and quick to make and total comfort food! Try it out! 

Sunday, August 16, 2015

Wall shelves

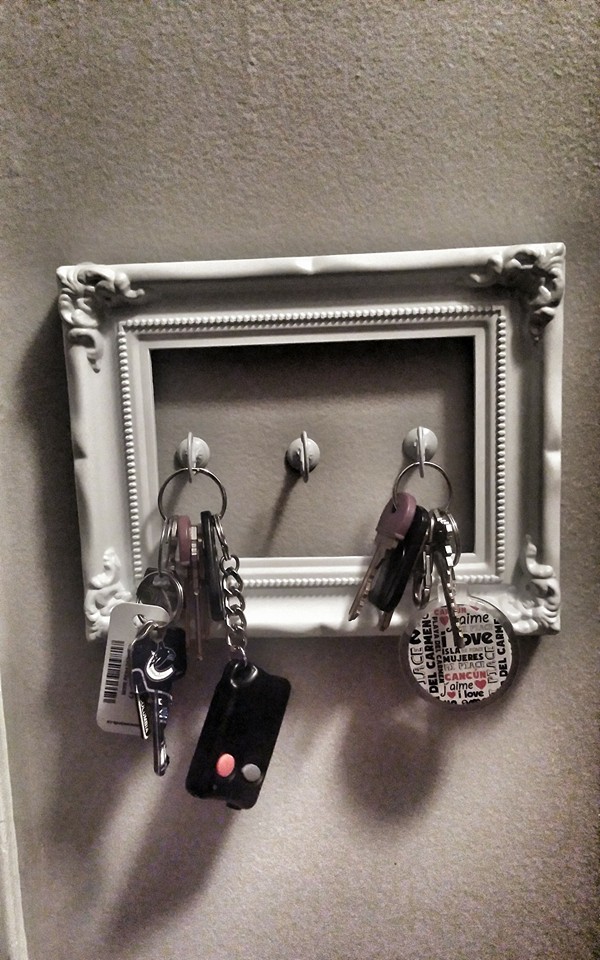
Just put up some cute Ikea wall shelves today on my "feature wall" (Ikea, go figure!) Was kind of sad to make holes on my beautifully new painted stripes but it turned out great!

I will also post a picture after I figure out what to put up on them...I got some ideas in mind!

Friday, August 14, 2015

Patio idea

The next thing on my list is to tackle my patio. I didn't think a little studio apartment would require so much work!!

I have some really cool ideas for my patio, stick around to see the before and after pics! It's a really long and narrow patio but it's got some potential!

Here's a picture I found on Pinterest as inspiration, love this idea and my patio is the same width...

Wednesday, August 12, 2015

Build a table with left over countertop

So I only need about 12 inch wide of a countertop and I'm thinking of building a cool table for my patio with the remainder material. Ill definitely blog about it and tmake pictures of the progress!

I think that'll be such a cool idea, especially if I decide to get the butcher block countertop! 😍😍

Saturday, August 8, 2015

What to do with an extra mirror?

I had a nice IKEA mirror laying around that I couldn't figure out where I wanted to put, and my black coffee table that I wanted to get rid of... so I thought I would try putting my mirror on my coffee table to give it a cool effect and look like I have more space (which is what you have to keep trying to do in a studio apartment!) It definitely changed the whole look, which is what I was going for.

So if you have some mirrors kicking around, don't toss them because you could always put them to some cool use!

Friday, August 7, 2015

LED tv stand gives cool vibe..

I was going through my closet organizing and found nice IKEA LED lights I had no use for anymore. I thought it would be cool to put it in my Ikea bookshelf that I used as a tv stand to give off a cool ambient lighting effect when I sat in my room in the dark.

I went to home depot and bought a pack of little velcro attachments and used them so I could easily remove the lights whenever I wanted without ruining them or my bookshelf. Super easy and it turned  out really fun. Made the room really relaxing.

Make a room feel more spacious and inviting

After staring at my plain light grey wall in my little "shoebox" apartment, I thought what could make a room appear wider without spending tons of money on huge mirrors every where. Then I thought stripes! Horizontal stripes always make things looks and feel wider. What better way than to use the dark grey paint that I have been using to accent the rest of my apartment and kitchen with to make a cool feature wall!

Thankfully my boyfriend has every single tool you can possibly ask for, so when I randomly asked him if he had a laser that levels and gives you perfectly straight lines... of course he said yes.

So we measured out the height of the wall which worked out to be around 91 inches.
Then take 91 and divide that by 7 (because that's how many stripes I wanted).
So that means each stripe will be 13 inches.
So I used a ladder and placed the laser on each step with the help of stacking lots of books and DVDs to measure up to each 13 inch mark I had placed on my wall with Frog tape.
Make sure you already have your base color painted on the whole wall first (if that wasn't obvious already!)
Then I used the laser beam and used the Frog tape to make straight lines across the wall to make the 7 stripes, now the important thing is to make sure you are putting the tape along the base color and not on the side you are painting the stripes on (if that makes sense).

Now after I placed two coats, I gave the paint about 40 ish minutes to dry to peal off the tape (away from the paint) gently. I did not want to wait until the paint was fully dry to avoid ripping and pealing off my beautiful new stripes! And voila! I got crisp, beautiful dark grey stripes on my wall. It made me love the room so much, I honestly could not stop staring at it for hours. It made the room feel so cozy and inviting and I just love sitting in this room. It made it feel bigger and more spacious.

Hope you guys love it as much as I do!!
Before...

After!!


Bathroom upgrading


The bathroom needed some MAJOR upgrading. The colors were just so bland and boring. I painted the ceiling and walls light grey and decided to make the vanity table side wall "pop" by adding some cool wall paper design. It turned out awesome and really brought out the bathroom. I upgraded the faucet, wow does changing a fixture really make a huge difference. The beautiful chrome faucet was found by accident while shopping with my mother at Costco, and the price was just as awesome too..$99! Talk about sticking to my budget without compromising style and design. I will eventually change the bathroom lighting and mirror but all in good timing..hey, I still gotta pay my bills! :P


S

Before

After


Coffee "bar" nook

After browsing Pinterest for some more inspiration, I found a cool idea for some space I had in my kitchen area. Why not have a cute little coffee bar? I had an IKEA malm vanity table kicking around that was just taking up space in my main living area so I decided to move it to my kitchen and throw some extra textiles I had that was causing clutter in other areas.

It definitely made the kitchen area seem more cozy and more of a modern feel to it! Let me know what you guys think :)

As usual, my before and (kind of) after pics!

Before...

Almost after...lol


kitchen progress!

So after about 4 months of moving in and paying bills and living expenses... I finally was able to buy my new kitchen cabinets at IKEA (not to mention, the sizes I needed were IMPOSSIBLE to find!).

Super excited I finally have my new beautiful white cabinets, now I can finally rip out the rest of the ugly wood ones and start to see some hope! It was definitely hard walking through the kitchen every day and seeing that horrid site so you can imagine my excitement! After removing the old cabinets and ugly old appliances, there are always lovely surprises to find behind the walls (which I would rather not say!). There were lots of big holes in the wall that we covered with spray foam to fill the larger holes and then mesh and dry wall putty to fill in the rest. We used at least 2 coats after sanding. Then I decided to use my left over dark grey paint that I used on all my doors (which I will also blog about) in my kitchen to make the white cabinets pop. I was really happy with the results, but still not done painting but you get the jist!

After looking around for under cabinet lighting, I realized how expensive all of them were and I didn't want any wires or cords to show so after some smart shopping I found some cool simple and modern puck lights from IKEA that were a really good price and battery operated to add a nice touch to my kitchen.

Here a few pictures to show the transformation progress. Still so much more to do...finish painting, put custom wine rack along the side of the microwave range and add back splash but it's getting there!! :)

Before...


The kitchen...urgh

So, let's not even talk about the kitchen. First off, the pictures make the before picture of the kitchen look way better than it actually did up close in person! The old sticky wood cupboards, yucky off white/yellow walls (which I think the previous owners were smokers in here and it is more like a smokers yellow paint color, yuck!) It just overall had the worst vibe ever. It totally depressed me walking through here every day and kind of made me regret buying this place! But at the end of the day, I bought it and the work must get done somehow!

I didn't waste any time ripping the kitchen apart, I think I lasted 20 minutes after walking in to it after getting my keys! So like I mentioned in my previous post, single person, everything is expensive, doing it all myself, blah blah blah...so everything I had planned to do for renos was on an EXTREME budget!!! 

My game plan was to completely upgrade the one side of my kitchen (the side with the sink), by buying Giani granite paint and Giani cabinet paint..it was well worth it and saved me A LOT of money in the end which was super important. The other side with the fridge and stove was going to be completely new everything so that's where I needed to keep my budget. After the first week of being moved in, I managed to finish painting the cupboards from ugly brown wood, to beautiful white. My boyfriend helped me drill holes in the cupboards to screw in the modern handles onto them ...and WOW, what a difference already! 

The following week I tried out the Giani granite paint and after spending hours painting the granite design on my counter top, I realized I liked it better when I had just used the black base paint that came in the kit..yup, you guessed it. I painted over all my hard work with the base paint then used the sealer to give me a gloss black finish. Then after hours and hours of looking online and at home depot multiple times for the perfect back splash, I finally saw the one I had envisioned in my mind at Lowes. Phiew, now that I got that out of the way ,now here's the fun part. Cutting small pieces of glass tile (Dave did this part of course), and placing them one by one took a lot of patience and meticulous work. Also grouting for my first time ever was not as much fun as I had anticipated! But overall, it turned out great! For the final touch, I found a beautiful modern chrome faucet while at Lowes that was really well priced and voila!

Here are the before and ALMOST not so after pic of the one side of my kitchen....

Get the keys to my FIRST place!!


Needless to say, I did not get much sleep the night before getting my keys to my place! Being a first time home owner has come with a lot of different feelings and nerves...I feel excitement, nervous, freedom, scared...and did I mention scared?! But this is definitely going to be a fun experience!


I never thought that I would be buying an apartment, but moving to BC as a single person kind of limits your options because everything is so bloody expensive around here! Not to mention, buying a studio apartment! This building is from the 70's, so you can imagine how much TLC it needs. I will be posting and blogging on my reno and design progress as I go, and I can't wait to hear all your feedback!

I will also be posting lots of DIYs that I will be doing with the help of my lovely boyfriend (thank god for him!!) Please feel free to ask me any questions and to comment, I would love to know what you guys think!